January 2026 S M T W T F S 1 2 3 4 5 6 7 8 9 10 11 12 13 14 15 16 17 18 19 20 21 22 23 24 25 26 27 28 29 30 31 -
Recent Posts
New hosting site for Classic Weller
Classic Weller articles will be migrated to this new hosting site.
G. Beat.
Posted in General
Leave a comment
Weller WX2 Station
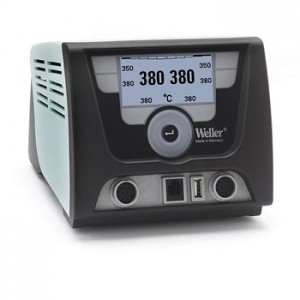
The new Weller WX2 Soldering station was introduced in Europe this Summer (2010).
This new model will be available in the North America during Spring 2011.
Enjoy the 3 minute video. A 720p (HD) version is selectable, turn up your speakers!
Weller WX2 Introduction (video)
Posted in Weller Stations
Leave a comment
Disassembly of Weller iron handle
Weller North America standardized on the EC232 / TC218 style handle for many of its soldering irons in the early 1980s. This handle has been used for a variety of soldering irons and stations by Weller for the past 25 years. The design features a black heater insulator that permits the usage of plug-in heaters (EC234) as well as wired heaters (WCC102, HE40); and a cord strain relief design for 3 and 5-wire power cords (24 VAC or 120 VAC line voltage) Weller uses this handle design for the EC1201A (EC232); the TC201T (TC218); WCC101 (EC232); and SPG40 (orange colored) soldering irons.
Instructions for disassembly of Weller iron handles
Weller_Handle_Disassembly
Weller WCC100 Station

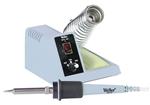
Weller discontinued production of the WCC100 soldering station in 1999. The WCC100 soldering station uses the popular “ET” series soldering tips, which are used on other Weller soldering stations (EC series, WES51, WESD51).
Classic_Weller_WCC100
Weller WCC100 Replacement Part Numbers
- WCC101 – Replacement Iron w/ETA tip
- WCC102 – Replacement Heater (120 V)
- WCC103 – Temperature Sensor w/Spring
- WCC104 – Sponge
- WCC105 – Spring and Funnel Assembly
- WCC106 – Control Board
- WCC108 – Weller Barrel Nut
- SW120 – Illuminated Rocker Switch (Carling LRA series)
Posted in General
10 Comments
Dish Feed Systems by W0LMD
Dish Feed Systems
An ideal dish feed system should pick up signals equally well from the whole surface of the dish, and no signals whatsoever outside of the dish. The ideal dish feed system does not exist! I am sure dish feeds will replace Religion and Politics as favorite argument topics.
Feed systems that do not pickup or radiate to all areas of the dish equally well are said to have “illumination loss.” Feed systems that pickup or radiate signals outside the dish are said to have “spillover loss”. All feed systems will have both problems to some degree. A feed system with a very wide angle of radiation will have illumination loss caused by too much power concentration outside the area of the dish, and will also pick up background noise from the ground and around the dish in general. A highly directive, high gain feed systems with a narrow beam pattern will loose the gain provided by the outer area of the dish and result in a weaker dish signal. Problems, problems.
There are many dish feed systems in popular use. At lower frequencies, the trend is towards linear dipoles; at higher frequencies the trend is towards horns. The medium frequencies that I am currently interested in (435 MHz, 1269 MHz, and 2400 MHz for AO-40 & DSP Moonbounce use) use quite a collection of feed systems, none perfect. AO-40 users have found that linear feed systems result in considerable QSB when the squint angle (amount of off pointing of the AO-40 antennas) rises, so a circular feed system is needed on both transmit and receive.
I would like to give you the benefit of not an exhaustive, but certainly an exhausting amount of research into possible feed systems for my 10′ TVRO F.35 dish and various smaller offset fed dishes. I collected evaluation data on many different feed systems for 2401 MHz that I have built and tested. I found some good ones and many bad ones.
The dish feed systems that I have built and tested so far fall into 2 classes – Helix systems, and Patch systems.
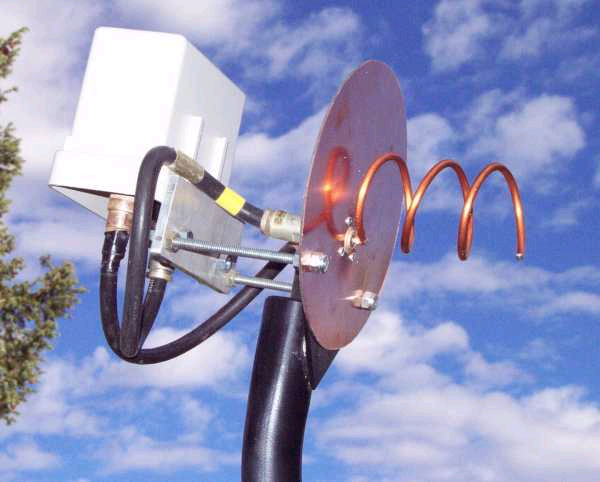
A helix feed is simplicity personified. Mount a type N connector on a flat reflector plate and solder a couple of turns wire to the inner terminal. I have heard of anywhere from 2 turns to 6 turns used as dish feeds as shown in the picture at the left. The 2 turn helices are are used for very short focal length dishes in the F.3 region, and the 6 turn helices are used with longer focal length (~F.6) dishes, typically the offset fed dishes. Since AO-40 is right circular and the dish reflection will reverse the polarity, the helix should be wound counterclockwise, looking forward from the connector. I have found that helix feeds are affected very little by scalar rings. The helix works best with longer focal length offset fed dishes. A 36″ by 21″ DirecPC dish, shown at the right, makes a good portable AO-40 receive antenna when fitted with a surplus downconverter and a 5 1/2 turn helix.
Patch dish feeds

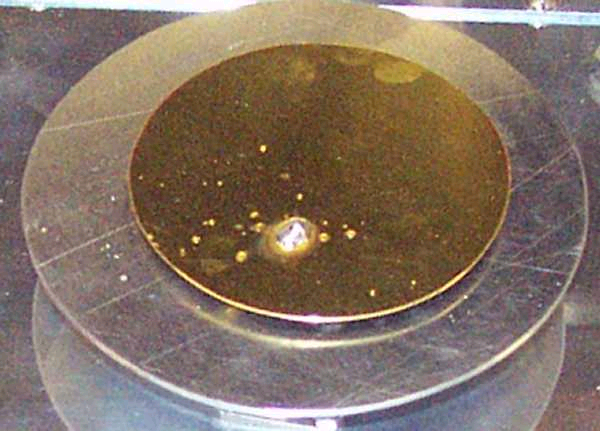
A patch feed, shown at the left, is just as simple. It is typically a type N connector on a flat reflector plate with a tuned flat metal plate soldered to the inner terminal. Sometimes the flat plate is square; sometimes it is rectangular. It could even be round . It could have 2 feed points, 90 degrees out of phase for circular polarization. On 2400 MHz, the plate is about 2 1/4″ square and spaced between 1/16″ to 1/4″ from the reflector. The round patches are 2 5/8″ in diameter at 2401 MHz. The point of attachment is around halfway between the center and the edge. Size and spacing and point of attachment are rigorously computed. A patch antenna works over a much narrower frequency range than a helix. A patch antenna without a scalar ring has about a 150 degrees wide radiation pattern and at 2401 MHz, a 1″ high scalar ring narrows this down to about 130 degrees. The patch works best with short focal length center fed dishes. Even a 3′ BBQ grill dish, if covered with 1/4″ screening, cut and lashed to conform to the dish’s concave surface,as shown at the right, works better with a patch
External Affects on Dish Feeds
You are in for a big surprise if you think that the dish will not have much affect on the resonance and impedance of a feed system. As the feed system is moved in and out of focus, the resonance and impedance will change drastically. The size of the reflector plate and the spacing also affects the resonance and impedance. A larger reflector is less affected by dimensional tolerances. My 435 MHz patch moves 4% down in resonant frequency as it approaches the focal point of my 10′ dish.
Focusing the Feed System
As a feed system moves towards the dish (inside the focus point) the gain falls off very rapidly. As it moves away from the point of focus, the loss is more gradual, and the beamwidth widens. You can find the focus point of your dish mathematically or by using small mirrors as described elsewhere on this webpage. I try to put the exact focus point on the highest frequency feed system. For an AO-40 single, dual, or tri band patch, this is the 2401 MHz patch plate. For a helix, it is at the midpoint of the 2401 MHz helix coil.
Circularly Polarized Dish Feeds That I Have Made
A Helix Feed System
My experimentation on various dishes over the last year has led me to the conclusion that a helix feed system will be the feed type of choice for offset fed dishes, which are longer focal length, better matched to the narrower pattern given by the helix.
Making A Helix Feed System for the PrimeStar Dish and Other Small Offset Fed Dishes
Patch Feed Systems
A patch antenna can be thought of as a 2 dimensional dipole. At 2401 MHz, a patch antenna looks like a small metal plate spaced a fraction of an inch above a slightly larger plate. Some times the plate is square; sometimes rectangular. I prefer a round patch plate, but I have heard of an oval patch plate. The plate is fed off center at a 50 ohm point with the inner conductor of the 50 ohm feedline going to this feedpoint. The outer shield of the coax is connected to the reflector plate. The reflector plate is 4″ to 6″ in diameter, sometimes with a 1 1/4″ high scalar ring running around the perimeter.
Multi band patch feed systems can be built which will let the BUD be used for both uplink transmitting and downlink receiving.
Circular Polarized Patch Feeds
The antennas on board AO-40 are Right Hand Circularly Polarized (RHCP). If you use a linearly polarized antenna (vertical or horizontal), you lose 3 db. Experience shows that linear polarized stations have more QSB. But the worst case is a cross polarized antenna that will lose a couple of S units!
So we should look for a good RHCP feed for our BUD, right? No. Like any mirror, a dish reverses the polarization, so what we need is a good LHCP feed.
Until recently I didn’t think any really existed. The rectangular dog eared ones always test about 3 to 6 db weaker on AO-40. I finally tested a “circular” one for 2401 MHz that really worked well.
I took a 7 1/2′ dish which I was preparing for Gunther,W8GSM, to the CSVHF society meeting in July, 2002. At the antenna testing event, the 7 1/2′ dish with a dual band (U & S) patch, running a 2401 MHz patch in front and a 435 MHz patch behind it, pinned the needle on 2401 MHz, testing out with 37 db of gain but poor circularity. I believe this gain figure is way too high; maybe pinning the needle on the meter bent it. All my charts show that even at 100% dish efficiency a gain of 35 db would be expected, and the more common 50% efficiency would produce 32 db of gain. A more reasonable gain for the 435 MHz patch of 12 db was more what I expected it to be. But it did show the potential of multiband feed systems on a BUD. When I got back home I tried several things like grounding the center of the patch to the center of the reflector, etc. that improved circularity and resulted in an even stronger S band AO-40 beacon signal.
Future goals are making reversable polarization patch feeds and multible diversity patch feeds for EME, but these will be another story.
Making a Circularly Polarized 2401 MHz Patch Feed
Making a Circularly Polarized 1269 MHz Patch Feed for the AO-40 L Band Uplinks
Making a Circularly Polarized 435 MHz Patch Feed for the AO-40 U Band Uplinks
Dual Band Feed Systems
If you have gone to all the trouble to get that BUD moving in both Azimuth and Elevation, it would be a shame to only use it for AO-40 receive on 2401 MHz. If the BUD is larger than 3′ or 1 meter, it will also work well for 1269 MHz transmit and 2401 MHz receive. If it is larger than 6′ or 2 meters, it should also do fine on 435 MHz transmit.
If the dish is an offset fed dish, build a dual band helix feed described below. The big centerfed BUD will really perform if you build a circular polarized dual or tri band patch feed for it. The multiband feed systems are not simple, and may take a few tries to get all the holes in the right place. If the description gets a bit confusing, use some cardboard to model the feed system before wasting a nice piece of metal!
Making a Dual Band Helix Feed for 435 MHz and 2401 MHz
A Dual Band Patch Feed for your BUD
My initial dual band patch feeds were built by making the individual patches, already described, then mounting the patches (S & L) side by side as shown at the right, but the pointing error was unacceptable. My recent dual band patch feeds have been axially mounted, and perform very well.
6′ or larger center fed dishes on AO-40 do well with dual band (2401 MHz and 435 MHz – S & U bands) patch feeds. There is a surplus metal dealer south of Denver that has a good supply of aluminum sheets for $1.60 a pound. I cut these sheets on my bandsaw to make a great looking dual patch system. Sometimes it takes a bit of effort get the SWR down on the 435 MHz patch. I use a $700 graphic SWR meter from AEA called a 140-525 Analyst to get a very close match. Some may question whether it is worth the effort to achieve circularity on the transmitting patch. AO-40 operators have found that stations with circularly polarized uplink signals show considerably less QSB, especially during high squint angle times. I trim the reflector on the 2401 MHz to 3 1/2″ diameter to minimize the blockage it presents to the 435 MHz or 1269 MHz patches.
Making a Dual Band 435 MHz and 2401 MHz Patch Feed
Making a Dual Band 1269 MHz and 2401 MHz Patch Feed
A TRI Band Patch Feed System for TVRO Dishes
AO-40 currently has 3 bands in common use. 435 MHz (Mode U) is the most popular uplink frequency, and 1269 MHz (Mode L) is growing in uplink popularity, especially when the Squint angle is in a favorable position. 2401 MHz is the downlink frequency in common use. While most AO-40 hams with BUDs just use them for receiving, a large center fed dish makes a great L & U band transmitting antenna also if the BUD is 5′ in diameter or bigger.
My measurements found the following Tri Band Circular Patch Performance from my 10′ BUD:
435 MHz – 18 db of gain – 20 degrees beamwidth (a 40 el KLM cross yagi has 15 db of gain)
1269 MHz – 31 db of gain – 6 degrees beamwidth (My 45 element Directive Systems Loop Yagi has 20 db of gain)
2401 MHz – 35 db of gain – 3 degrees beamwidth (3′ BBQ grill dish has ~20 db of gain)
A 7 1/2′ dish is 1/2 the area of a 10′ dish and will be 3 db down on each measurement; a 5′ dish is 1/4 the area and will be 6 db down. My new 14′ dish is 3 db stronger than the 10′ dish measurements.
Making a TRI Band Patch Feed System for TVRO Dishes
EME Patch Feed Systems for the BUD
If you have a 10′ or larger dish, you should consider using it for Moonbounce. The Moon is quite a ways from Earth, about 224,000 miles or so, and not much of the energy sent its way is reflected. But it will be your most distant contact if you can make it happen. Not too many years ago, EME was accomplished with big antennas and big amplifiers. But recent developments make it possible to receive and send a signal from the moon using that old BUD in the back yard.
There are a number of formulas for predicting the probability of sucess in you EME efforts. A number of different VHF and UHF bands are used, but in this discussion I will limit the bands to 70 CM (432 MHz) and especially 23 CM (1296 MHz).
1296 EME is accomplish by sending a right circular polarized signal (like AO-40) to the Moon, and receiving a left circular echo from the Moon (the echo inverts the circularity). Now considering the fact that the dish also inverts the polarity, what we are trying to accomplish is achieved by generating a left circular polarized signal in the feed system, send it into the dish where it reflects into a right circular signal beamed at the Moon. The Moon reflects part of the energy sent its way, and the inverted reflection is now left circular. The BUD reflects this signal, and the feed system collects the signal as right circular polarized. Gets a bit confusing, but the bottom line is that the feed must produce a left circular signal and receive a right circular signal.
The generation and reception of these two polarities is not too difficult to accomplish if the feed system for the BUD is made with dual polarity. This can be done using the previous patch systems by either using a patch with a single coax connector and a enabling a polarity injecting capacitor on either side of it, or a single polarity injecting capacitor with a pair of coax connectors on either sside of the polarity injector. The dual coax connector technique seems simpler so is the system chosen for the designs that follow.
Two Coax Connectors, One Circularity Injector Patch Feed
Start the duality by placing the two coax connectors 90 degrees displaced from each other.Then the circularity injecting capacitor is placed between the two connectors at 45 degrees. Sending the RF to the connector at the left results in a left circular signal. Receiving a signal with the right connector will favor a right cicularly polarized signal. By also placing capacity injectors diametrically opposite the transmit and receive connectors, each circularity and be individually adjusted and matched.
So the actual addition to an existing patch feed shown above is one coax connector and one additional frequency trimming capacitor in return for an ability to work the Moon. .
The picture at the left shows the front side of a standard left circular S & L bands patch feed, a dual polarity L band patch feed, and a dual S & L band patch feed with dual circularity on the L band and left circularity on the S band. The dual circularity is not so obvious from the front side of the patches.
The picture at the right shows the rear of the three patch feed systems, and shows the slightly greater complexity added with dual circularity. The S band feed hole was moved 90 degrees to assure circularity symetry of the dual circularity L band feeds.
Going one step further, a tri band circular S, L, & U band patch feed can be redesigned so that it becomes an S, 2L and 2U patch feed. This now lets a single large dish function as an EME antenna on 432 MHz and 1296 MHz, and operate as an AO-40 antenna using the left circular S band (2401 MHz) feed to the AIDC 3731 downconverter (to 145 MHz or 123 MHz) shown below the patches with your choice of an L band (1269 MHz) or U band (435 MHz) uplink. That’s getting a lot of bang for your buck! Components were carefully placed to assure maximum dual circularity symetry.
Making a Dual Circularity 1296 MHz Patch Feed for EME
Making a Left Circular 2401 MHz & a Dual Circularity 1296/1269 MHz Patch Feed for EME and AO-40
Making a Left Circular 2401 MHz, a Dual Circularity 1296/1269 MHz, and Dual Circularity 432/435 MHz Patch Feed for EME and AO-40
Metric Bolts
Several foreign builders have requested information about converting the USA standard bolts that I used to metric sizes. DJ9PC has built and is using the dual band S & L with his dish and has sent the following conversions:
4-40 bolts for holding connctors = 3 mm metric bolt. Drill oversize with a 4 mm drill.
6-32 bolt for tuning 2401 MHz patch circularity = 4 mm. Drill undersize with a 3.2mm drill and tap with a 4 mm tap.
10-24 bolt used to hold the disks together at the center = 5 mm. Drill oversize slightly with a 5 mm + drill.
1/4-20 bolt used for circularity and frequency tuning = 6 mm. Drill undersize with a 4.8 mm drill and tap with a 6 mm tap.
The reflectors and patch diameter and spacing dimensions can be converted from inches to mm by multiplying by 25.4. Thanks Peter.
Conclusions
When all is said and done, I have made up these dish & feed system rules:
1. Measure the F/D ratio of your dish. (F = Focus distance D = Diameter) Use any measurement system you wish. Determine focus point by attaching 2 small mirrors near the opposite edges of the dish, and, aiming the dish at the sun, see where the 2 reflections converge. My 10′ dish (120″) focuses 42″ from the center – it has an F/D of .35
2. If the F/D is less than .4 (typical of center fed TVRO dishes), use a Patch feed. If less than .35, don’t use a scalar ring. My 3′ barbecue grill with 1/4″ fence wire added is .3 F/D. It really works great with a soup can lid Patch.
3. If the F/D is greater than .4 (typical of homebuilt center fed dishes & offset fed dishes), use a Helix feed. Be sure the Helix is Left Circular wound (Counterclockwise forward when looking forward from reflector) for AO-40, since the dish reflection reverses the polarity, just like a mirror.
4. Make the Helix # turns = 1 turn for each .1 of F/D. My Primestar offset fed 40″ x 30″ & DirecPC 35″ x 21″ (pictured) have a .55 F/D. I use a 5 1/2 turn wide spaced Helix on them. My 18″ dish NETWORK hubcap is .6 F/D. A 6 turn close spaced Helix would be slightly better for it.
5. Small dishes may have too much blockage generating undesirable side lobes to be used for transmitting, but a dual (L & S bands) will work on a 3′ (1 meter) dish. If you have a 4′ or larger BUD, a dual (U & S or L & S bands) or triple (U, L, & S bands) feed systems make a lot of sense, and will produce more gain than a long yagi with 40 elements. Dishes under 6′, when used on the uplink, will require external amplifiers. 500 watts ERP is needed on 435 MHz and 1500 watts ERP is needed on 1269 MHz.
6. 6′ or larger BUDs will work AO-40 barefoot. Smaller dishes will require an external amplifier on the uplink if used for transmitting on the U or L bands. L2 will take 4 times more power or twice the dish’s diameter compared with L1 ERP power levels.
7. A 10′ or larger BUD puts you well within range of EME, so consider one of the dual circularity patch feed systems mentioned in this section.
Robert W0LMD robert@ultimatecharger.com
Posted in W0LMD
3 Comments
Weller Soldering 1977 Catalog
Seven years after Copper Industries (Houston, TX) purchased Weller Electric Manufacturing from Carl Weller they published their November 1977 Product Catalog #600.
http://bama.edebris.com/download/weller/catalogs/weller-catalog-600.pdf
The Weller WTCP and WTCPL were discontinued in 1976, except for some late military orders. I repaired a US Navy surplus WTCP station with a 1977 ink stamp inside TCP-1 iron. The 1977 catalog shows the the WTCPN model (replacing the WTCPL model). This model would be in production for 5 years (1981), when it would replaced with the WTCP series model (same form factor) that featured many changes.
* New TC-201 soldering iron. Plastic molded blue handle, black heater insulator, plug-in heater (EC-234), updated 3-pin iron connector (with twist lock).
* Power illuminated rocker switch changed from Carling TLG-Series Mid-Sized Tippette snap-in rocker switch https://www.carlingtech.com/sites/default/files/documents/TLG-Series_Details_%26_COS.pdf
to the Carling LRA-Series Curvette illuminated rocker switch. https://www.carlingtech.com/sites/default/files/documents/LRA-Series_Details_%26_COS_0.pdf
Posted in General, Weller Stations
8 Comments


